Here are creative solutioneering, we like to find new solutions and new ways of doing things, with an emphasis on the creative. Creativity is such an important part of a healthy mind that it is worth exploring in all its facets and aspects, and it needn’t be difficult to do, nor should it seem like a chore and, perhaps most importantly, it shouldn’t be expensive. In this post, I’d like to share how to create a lightpainted photograph using materials either already in the home, and with inexpensive items from a nearby dollar store.
Understanding Lightpainting
Lightpainting is a photographic technique where light sources are moved in a dark environment to create stunning visual effects. The camera, set on a long exposure, captures the trails of light, resulting in mesmerizing and often surreal images. This art form dates back to the early 20th century, with pioneers like Man Ray and Pablo Picasso experimenting with it. Over time, lightpainting has found its place in various creative fields, from fine art photography to commercial advertising, offering a unique way to visualize the interplay of light and motion.
The basic principles of lightpainting involve using a slow shutter speed, usually several seconds to minutes, while manipulating light sources such as flashlights, LED lights, or even sparklers. The photographer or an assistant “paints” with these light sources, moving them in desired patterns or around objects to illuminate them selectively. Key techniques include drawing directly in front of the camera, illuminating subjects from different angles, and using colored gels to add vibrant hues to the light trails. The possibilities are endless, limited only by the imagination, making lightpainting a dynamic and versatile form of photographic expression.
Lightpainting is traditionally performed with an SLR or dSLR camera which allow for manual modifications of the shutter speed, film/sensor ISO sensitivity, and the aperture. If you have a dSLR (and a tripod) you’re in great shape. It does not need to be a recent or top of the line dSLR either, as long as it allows you to control those three exposure controls. If not, fret not! Most modern phones have camera software that allows control over shutter speed and ISO sensitivity, which we can make work for us.
Materials
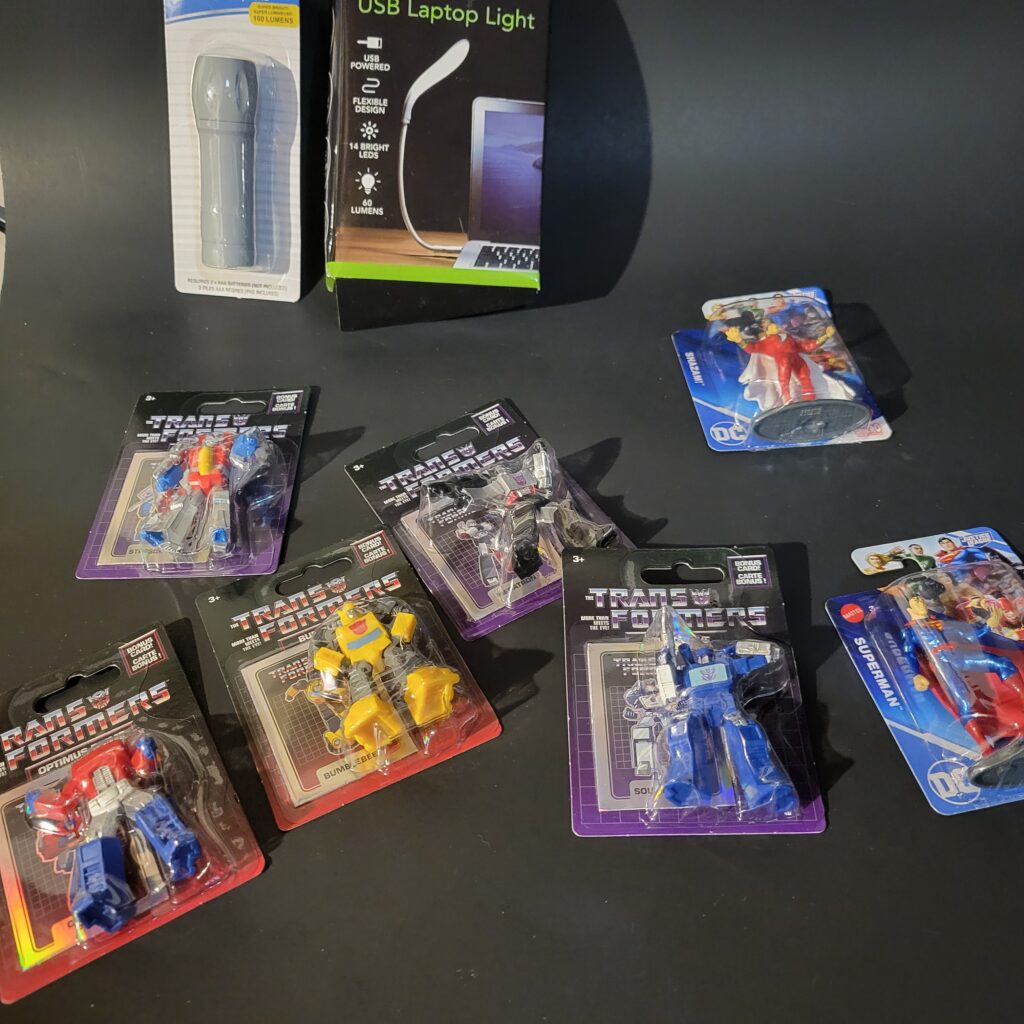
My goal is to create photographs that can be printed and framed, suitable to put on a wall. Expensive props for this are not required. In fact, aside from the camera (dSLR or phone), all the materials required can be – and have been – obtained from a nearby dollar store.
Material List
- LED Flashlight
- LED USB Light
- Large construction paper – black
- 7 toys
Total cost: $12.50
Setting up the Home Studio
Choosing the Right Space
Selecting the right space for your lightpainting studio is crucial, as a dark environment is essential for capturing the best results. Ideal locations include garages, basements, or any room that can be effectively darkened by blocking out all external light sources. When choosing your space, ensure it is free from ambient light pollution that could interfere with your long exposures. If a dedicated dark room is unavailable, you can use blackout curtains or cover windows and doors with thick, dark fabric to create the necessary darkness. If all else fails, do this at night when ambient, outdoor light is at a minimum.
Background Setup
Creating a proper background setup is essential for achieving clean, vibrant colours. Use the black cardboard from the dollar store to construct a dark background that will enhance the contrast of your lightpainting. Arrange the background to minimize unwanted reflections that can detract from the image quality. This setup not only enhances the visibility of your light trails but also provides a professional look to your photos by eliminating distractions.
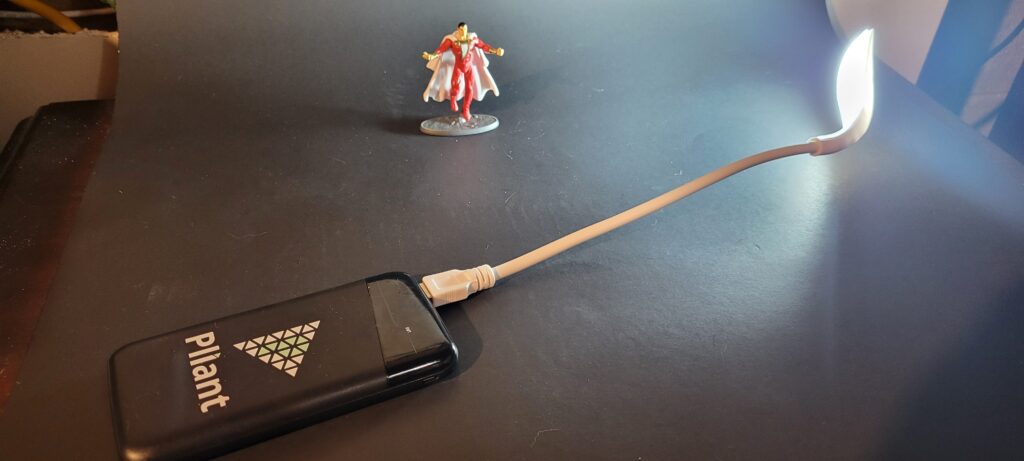
Lighting Setup
Positioning and securing your light sources is a critical aspect of lightpainting. Flashlights, LED lights, and other light sources should be strategically placed and securely mounted to allow for precise control. Create light modifiers using colored cellophane wrapped around the lights or by placing the lights inside translucent containers to diffuse and tint the light. Additionally, incorporating reflective surfaces, such as aluminum foil or mirrors, can help bounce and enhance the light effects, adding depth and dimension to your photos. Experimenting with different placements and angles will allow you to achieve a variety of creative outcomes.
Stabilizing the Camera
Ensuring your camera remains stable during long exposures is vital to avoid blurry images. Use a tripod to keep your camera steady, or if a tripod is not available, place the camera on a sturdy surface such as a pile of books. Additionally, using a remote shutter release or setting a timed shutter release can significantly reduce camera shake caused by pressing the shutter button. These techniques ensure that your camera captures sharp, clear images, allowing the beauty of your lightpainting to shine through without any unintended motion blur.
Smartphone’s will almost surely require a tripod; these are available at dollar store’s as well for just a few dollars, keeping our expenses to a minimum.
Camera Settings and Techniques
Camera Requirements
To achieve the best results in lightpainting, it is essential to use a camera capable of manual settings and long exposures. DSLRs and mirrorless cameras are ideal due to their advanced capabilities and flexibility. However, many advanced smartphone cameras can also be suitable, especially those that allow for manual control over exposure settings. When choosing a camera, ensure it has a “Bulb” mode or the ability to set long exposure times, as this is crucial for capturing the intricate details of lightpainting. Additionally, a camera with good low-light performance will help reduce noise and produce clearer images.
Basic Camera Settings
Setting your camera correctly is fundamental for successful lightpainting. Start with a long shutter speed, typically ranging from 10 seconds to several minutes, depending on the complexity of your lightpainting scene. Set the ISO to a low value (such as 100 or 200) to minimize noise and maintain image quality. The aperture should be adjusted to control the depth of field, often around f/8 to f/11, which helps in achieving a balanced exposure. Focus can be challenging in the dark; use a flashlight to illuminate a point where you plan to lightpaint, then switch to manual focus to lock in that distance. This ensures that the light trails and any illuminated subjects remain sharp.
The photos I took with the dSLR used these settings:
- 10 second exposure
- 200 ISO
- f/32 aperture
The photos I took with the Samsung Galaxy s21 used these settings:
- 10 second exposure
- 100 ISO
Techniques for Capturing Lightpainting
When starting with lightpainting, experiment with basic movements and patterns to understand how light interacts with the camera’s long exposure. For this project I used the USB LED light and waved it back and forth in front of the object to light each side of it.
Photo Editing
We’re looking to be creative, yet also be creative in an inexpensive fashion. For our purposes, there is no need for expensive photo editing software. We’re not professionals. We’re creative solutioneers looking to achieve an end with the resources we have at hand. To that end, I have used two different pieces of software, both of which are open source and, by extension, free:
- GIMP
- Darktable
Further, just to keep to the inexpensive side of the equation, I used an open source Ubuntu distribution, Kubuntu, which is available completely free of charge. I’m also using a 12 year old HP Pavilion all in one desktop, far from anything recent. We do not need the most recent, modern, expensive equipment to be creative.
I’m not going to go into too many details on how to edit the images using either GIMP or Darktable; that is a tale for another blog post, and there are many other online tutorials to do just that. Suffice it to say that for this experiment I used GIMP and Darktable to post-process images from both a mirrorless Sony NEX-C3 and a Samsung Galaxy S21-5g.
There is no one correct method or process to post-process images. Some images are not post-processed at all! The only correct method is the one that leaves you happy with your own art, simple as that.
The Result
I took multiple images of each prop with each camera. These are the images I ultimately chose, from the originals, to those that were post-processed
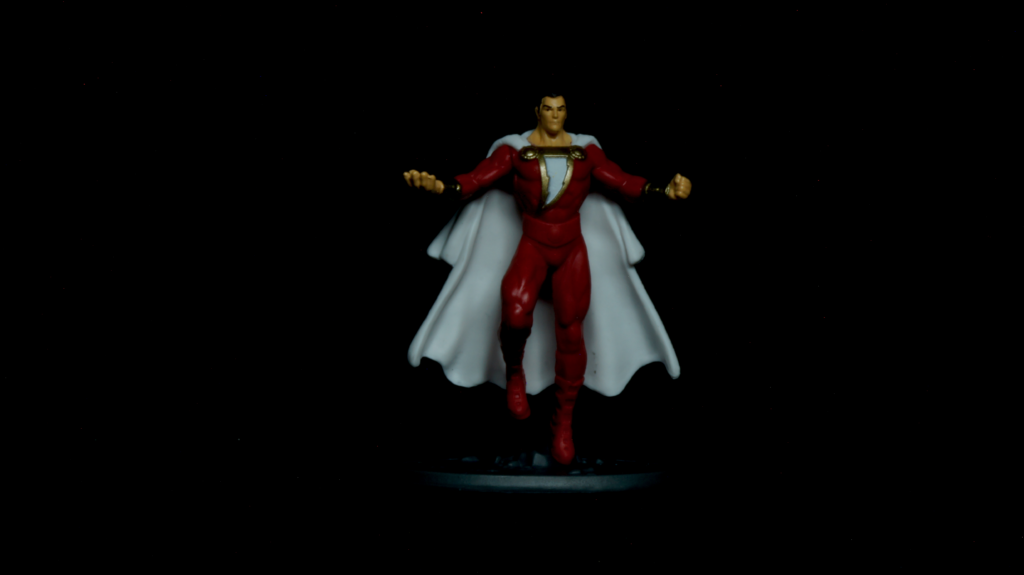
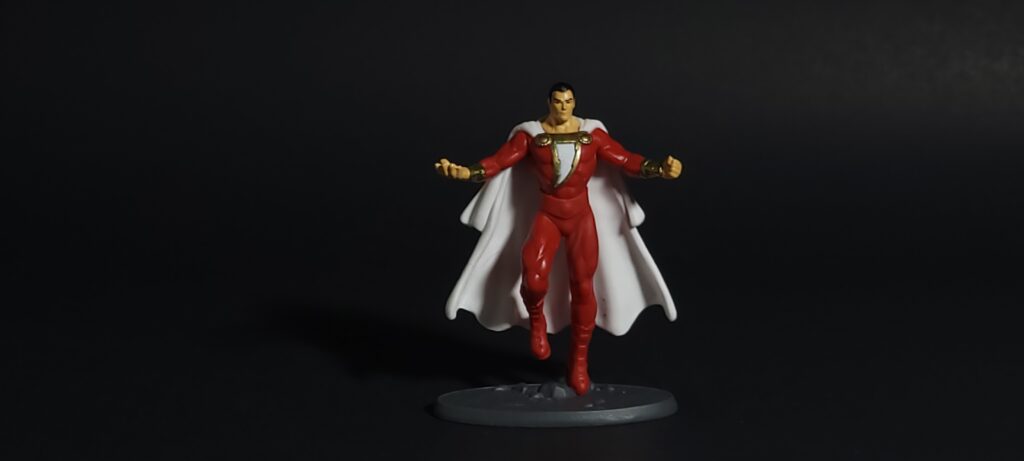
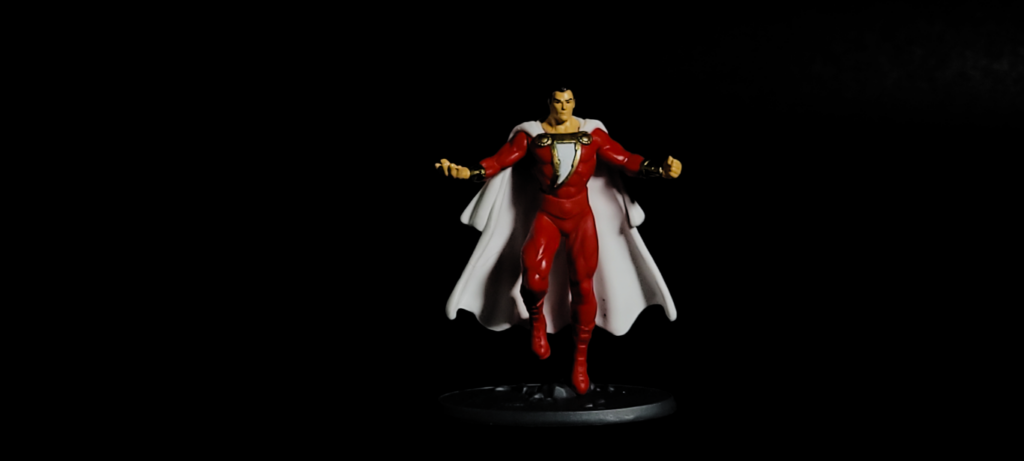
Shazam
Original – Sony NEX-C3
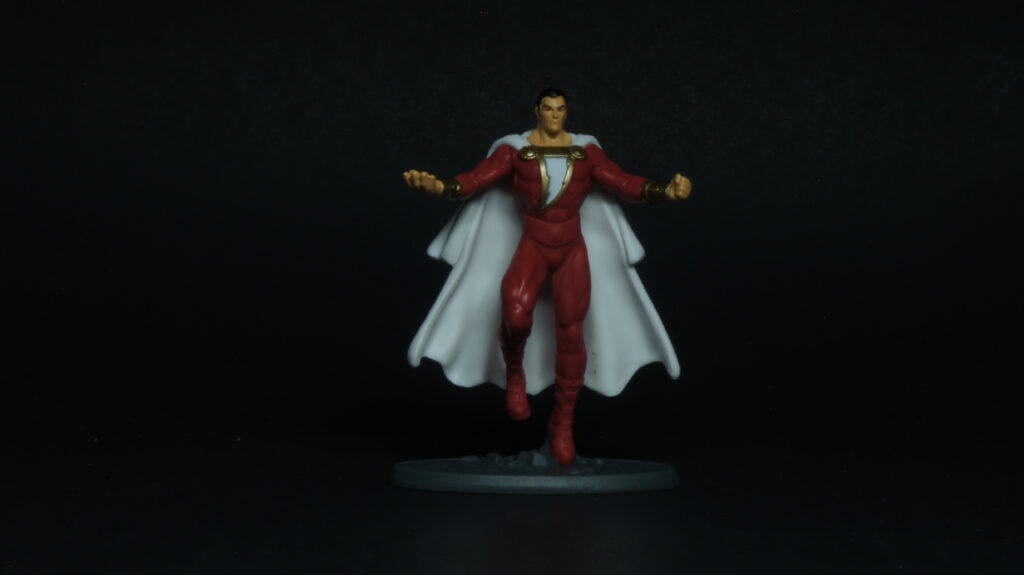
GIMP Post-Processing
Darktable Post-Processing

Original – Samsung Galaxy S21
GIMP Post-Processing

Darktable Post-Processing
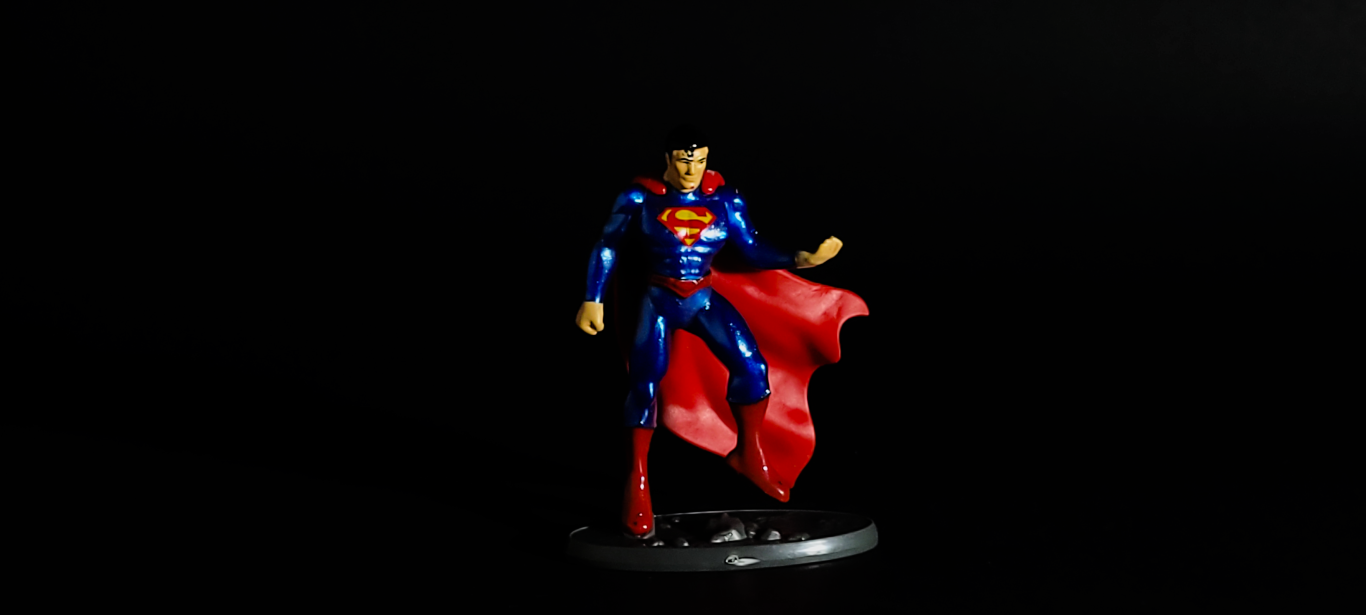
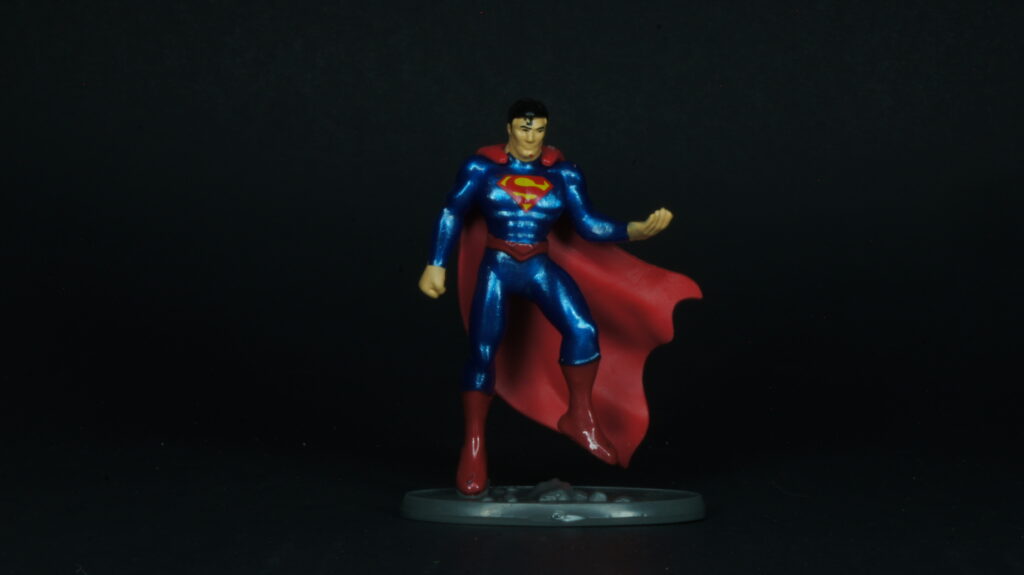
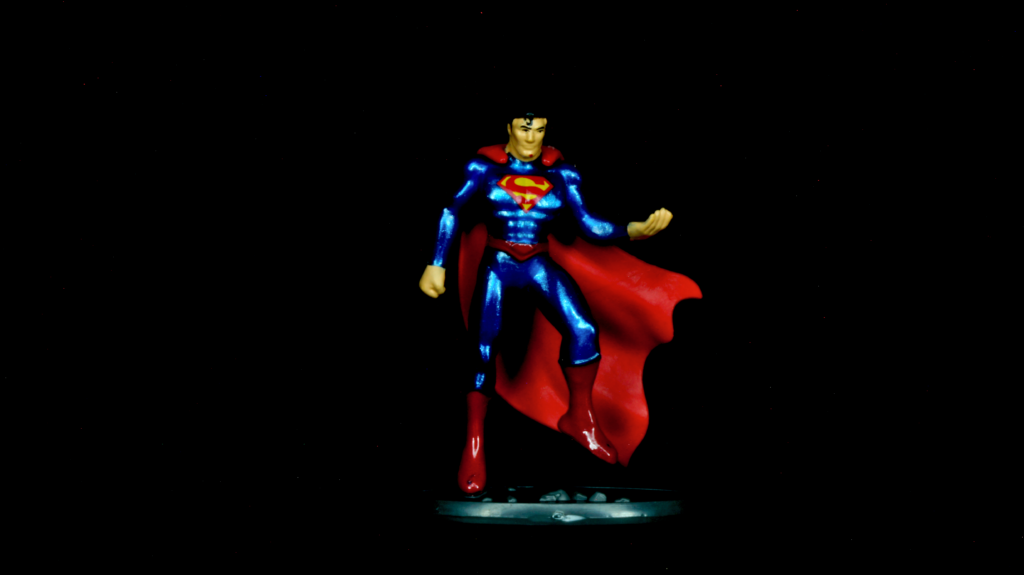
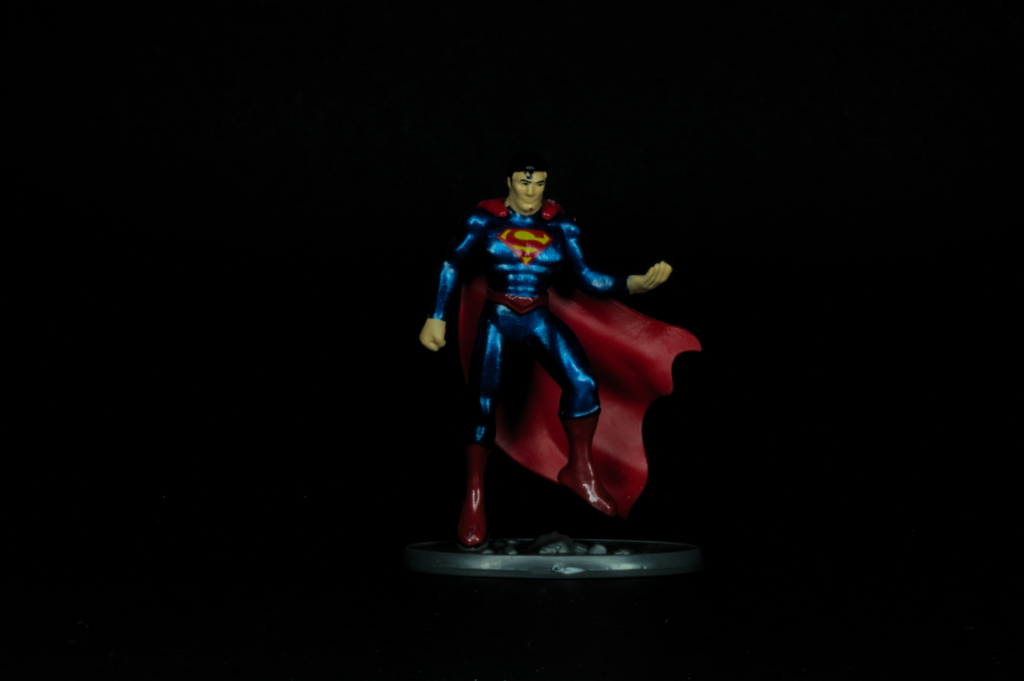
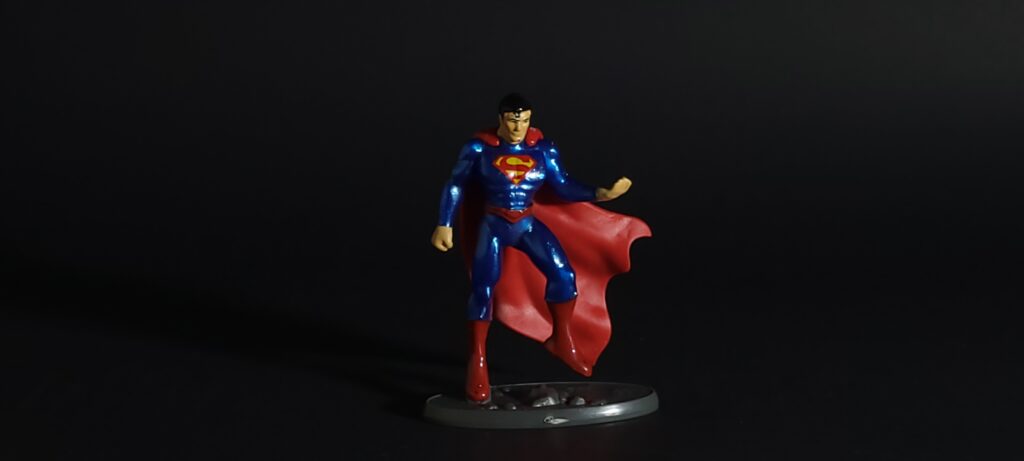
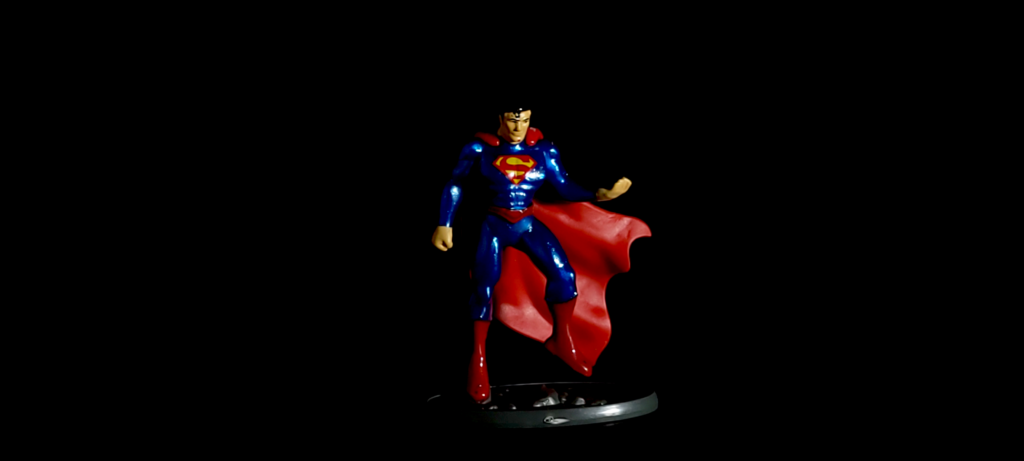
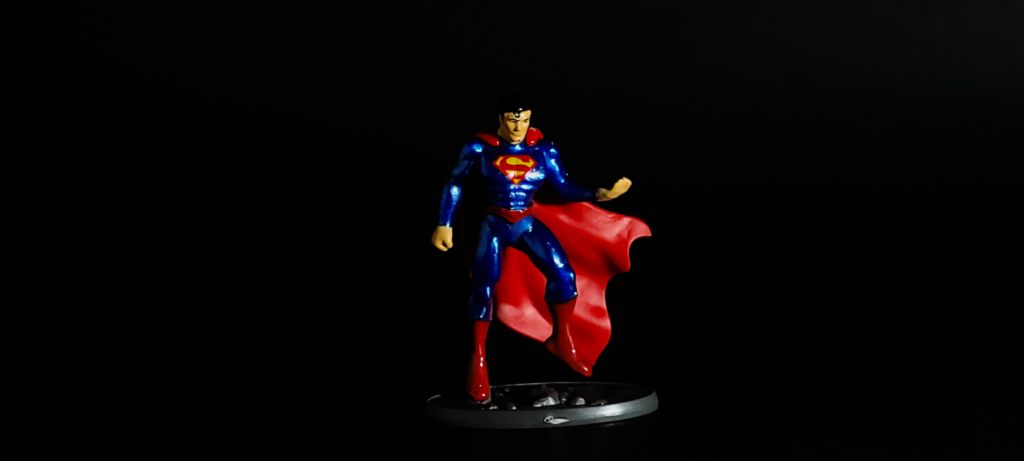
Superman
Original – Sony NEX-C3
GIMP Post-Processing
Darktable Post-Processing
Original – Samsung Galaxy S21
GIMP Post-Processing
Darktable Post-Processing
Conclusion
This lightpainting project exemplifies the essence of creative solutioneering, where innovative thinking and resourcefulness can come together to create stunning art. By leveraging inexpensive materials from a dollar store and utilizing open-source software, anyone can achieve professional-quality results without breaking the bank. This approach underscores that creativity is not about having the most expensive tools but about making the most of what you have. This project encourages you to think outside the box, using everyday items to achieve extraordinary outcomes. Embrace the spirit of creative solutioneering and discover the joy of creating beautiful, lightpainted photographs with minimal investment.